To understand why I decided to break into the software configurations on my Polestar 2, I must first emphasize my frustrations with the NHTSA implementation for Adaptive Driving Beam (ADB) headlights via an amendment to FMVSS 108.
Not only was the US behind the rest of the world in creating and publishing requirements for this borderline otherworldly piece of tech, but when they finally got around to it many OEMs who were attempting to future-proof their vehicles suddenly found themselves in an awkward position.
For the past few years multiple manufacturers have been building the hardware required to implement adaptive high beams under names like “pixel” or “matrix” headlights into their vehicles. The hope was that once the US regulation caught up with the rest of the world, customers would be able to enable their state of the art headlight technology with a simple software update.
This new type of headlight would allow users to keep their high beams on constantly while the system automatically recognizes other road users and selectively turns off the high beam for those specific regions. The safety benefit of this feature is two-fold; other drivers won’t be blinded by inadvertent high beam usage and you are now able to see everything almost as if it’s daytime. Watching this function for the first time was akin to watching my first magic trick as a child.
Fast forward roughly 3 years after the Polestar 2 was released and imagine the disappointment owners had reading the follow-up post from Polestar explaining the challenges with the new regulation and why their Pixel Headlights would forever be artificially limited:
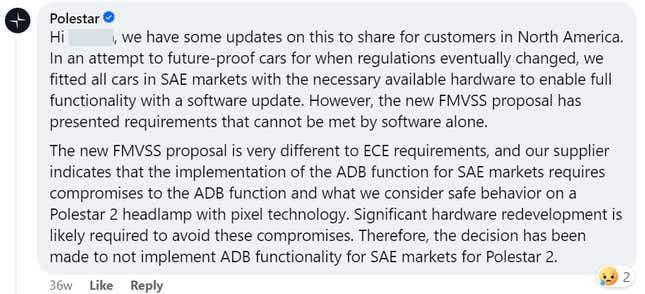
Not only was the very delayed regulation finally released, but it was released in a way that made objectively safer equipment already available in vehicles now permanently inaccessible for US drivers. After months of grumbling quietly to myself I finally decided I’d take this into my own hands.
Enter: Orbit from SPAyceTech
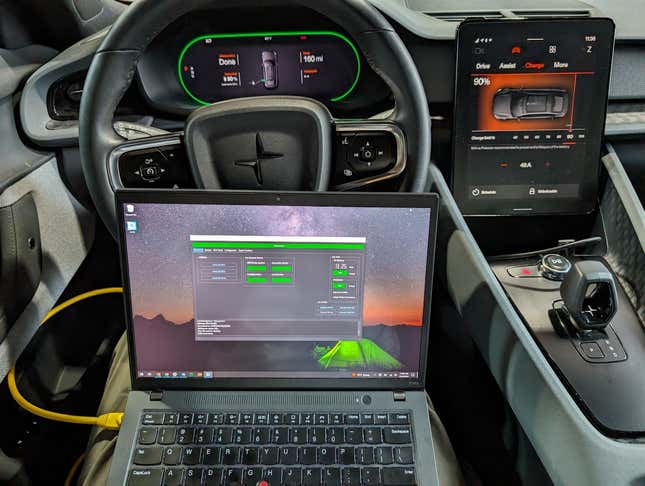
Orbit is a clever bit of software that allows users to access their vehicle’s diagnostics and configuration settings similar to how a dealership’s official service tool would. There are three license options for Orbit but for the Polestar 2 I’d recommend skipping right to the third one. At $325 it’s not cheap, but it provides you with the 1 year license and a PIN retrieval service which is necessary for the vehicle to authorize any changes you try to write to it. That plus an ENET OBD to RJ45 cable (link to the one I use here) is all you need to get started.
Once you fire up Orbit and follow their steps to get your CEM/VGM PINs, you should now have full access to all of the features and see this screen:
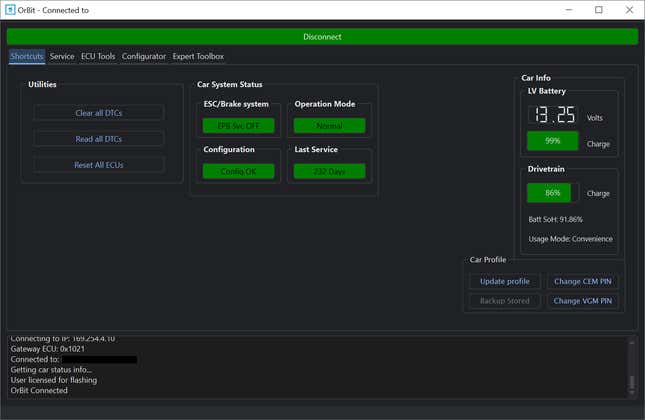
Photo: Zack Wickliffe
Here you can read/clear DTCs, reset ECUs, check on your 12v and high voltage battery health, etc. We’re going to jump over to the “Configurator” tab to get started with our changes.
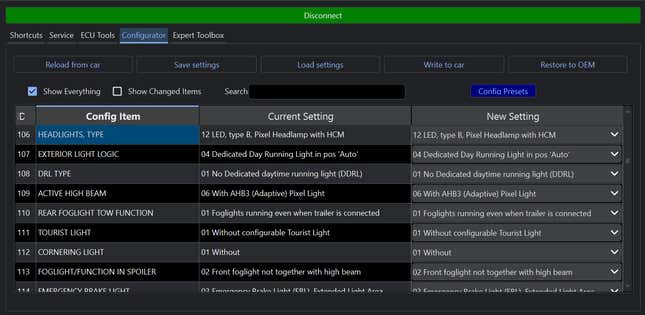
On this screen you’ll see a list of the different possible configurable items and the known selectable values for each. We’re going to make sure the “show everything” checkbox is selected and focus on two configuration IDs; 106 and 109.
Photo: Zack Wickliffe
The default value for 106 is 11 in the US, which resets the high beam assist to off with each vehicle power cycle while setting it to 12 allows us to keep the setting active persistently. This is purely for convenience but I don’t want to have to enable or disable assistance features every time I get into the vehicle.
To enable the Pixel Headlight functionality, jump down to configuration ID 109 and change the value from 03 to “06 With AHB3 (Adaptive) Pixel Light”. At this point you can hit “Write to car” and you’re done, but where’s the fun in that? What if I told you that your car that came without Adaptive Cruise Control or Lane Keep Assist had a secret?
That’s right, you can enable both of these features (that would have cost thousands at the time of ordering) with a few button presses as well. Press the blue “config presets” button and select “Cruise Control – PA/ACC – Level 1” then apply presets which auto-selects the correct values for all relevant configuration IDs.
Photo: Zack Wickliffe
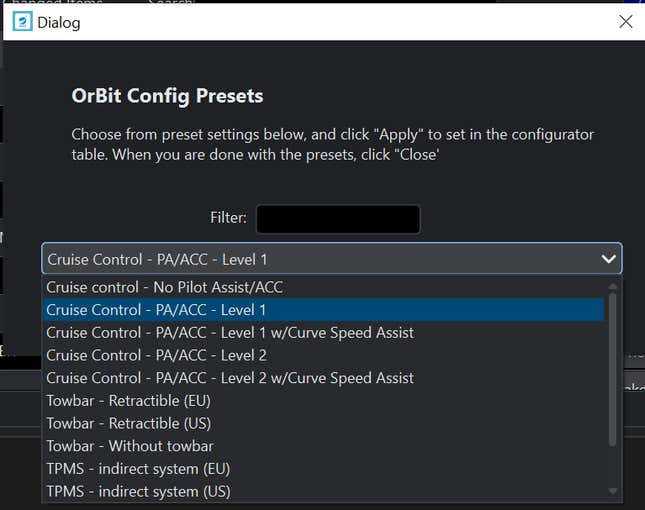
Now you can “write to car” allowing Orbit to program the necessary ECUs and run a reset procedure. I like to read and clear DTCs afterwards just to make sure everything was successful and that’s it, you now have the hardware you paid for working at its full capacity.
Of course this is only the tip of the iceberg as there are more than 500 configurable items in the list, so I’d be extremely curious to hear about how other users are making use of tools like Orbit to get the most out of their ownership. Post in the comments if you have experience modifying other IDs and what they do.
Disclaimer: As with any modifications I would recommend reverting to the car’s original configuration prior to a software upgrade or dealer visit just to make sure nothing unexpected happens and even then there’s always some risk to modifying your car so do it at your own risk.

