![]()
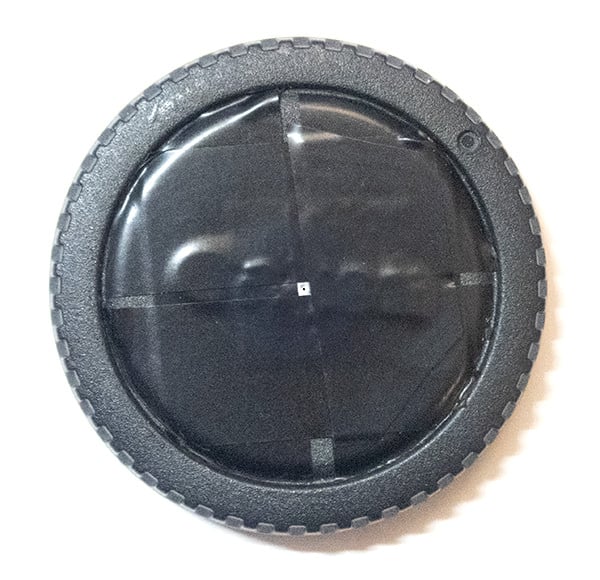
I was interested in seeing how well a pinhole would work on a small sensor (APS-C) DSLR so I decided to give it a try. All I needed to do was to drill a hole in the spare body cap, darken a piece of aluminum foil with a permanent marker, punch a small hole in it, and then tape it to the front of the body cap.
It looked like a fun project so I set out to collect the items I needed:
- DSLR camera and spare body cap
- Drill and 1/4 inch (or larger) drill bit
- Aluminum foil
- Scissors
- Black permanent marker
- Electrical tape
- Small pin
- Magnifying glass or loupe (the more powerful the better)
- Ruler with millimeter markings

Making the Pinhole
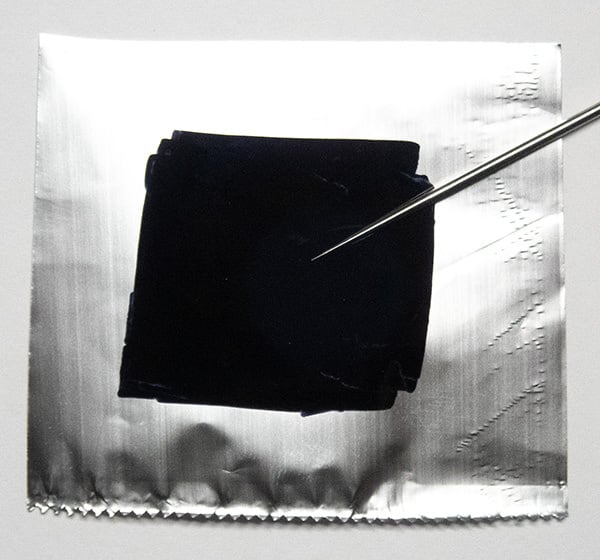
Cut a few pieces of aluminum foil about 5X5cm (2X2 inches) in size.
Use a black permanent marker to blacken the dull side of one of the pieces of foil.
Place the blackened piece of foil between a couple of other pieces of aluminum foil.
Place the stack of aluminum foil strips on a piece of wood.
Take a small needle and gently pierce the aluminum foil stack (rotate the needle as you push).
You don’t need to push all the way through the stack of foil, just push deep enough to get the size hole you want in the blackened piece of foil. This will take some trial and error.

Remove the blackened piece of aluminum foil and inspect the pinhole with a magnifier.
Make the pinhole as round and as smooth as you can, this will help produce the best quality image.
Repeat this process until you have a pinhole the diameter you want (use the calculator below).
After you have a pinhole you like, trim it and tape it to the body cap with the blackened side pointing toward the sensor. Try to place the pinhole in the center of the hole in the body cap. You can drill the body cap hole larger if you find this size causes some vignetting in your image (if you are using a camera with a larger digital sensor).
For your first attempt, don’t worry too much about getting the exact size pinhole but try to get one that is round, smooth, and as close to the size you want.


Recording Images With the Pinhole Camera
Place your camera on a tripod or stable surface.
Set your camera on Manual Exposure mode.
Set your ISO to 100 (this can be changed to any setting you like later).
Set the camera so you can see the histogram when you review the image you just recorded.
Turn on “Live View” if your camera has this feature, you might be able to see an image on the screen which will help you compose your images.
Set the camera’s self-timer to delay a few seconds after the shutter is tripped. This will help lessen vibrations.
Record an image with a 2-second exposure (on a bright sunny day).
Review the images and adjust the shutter speed according to the histogram information.
Repeat this process until you are happy with your exposure.
You are now recording digital pinhole images. Have fun!

I used a Canon 90D camera which has an APS-C (22.3 x 14.9mm) sensor. Because this camera has such a small sensor, I was interested to see what kind of image I would be able to create. I measured the distance from the sensor to the pinhole to be 52mm which meant I needed a pinhole with a diameter of 0.26mm (F# 200). This combination of pinhole-to-sensor distance, and the camera’s small APS-C sensor, created a horizontal field of view of about 24 degrees, which is about the same as an 83mm lens on a full-frame (35mm equivalent) camera.
Images recorded with DIY digital pinhole cameras tend not to be as sharp as those recorded with larger format film or photographic paper cameras (not that any pinhole images are really that sharp to begin with, that’s the beauty of this style of photography) but they are much easier to create and do not require film processing or a special darkroom setup.
Images Recorded with My DIY Digital Pinhole Camera

(ISO 100, 1.6 second exposure)

(ISO 100, 1.6 second exposure)

(ISO 100, 2.5 second exposure)

(ISO 100, 1.6 second exposure)

(ISO 100, 2.5 second exposure)
Give this a try and have fun creating your own unique pinhole images!
About the author: Paul Illsley is a photographer based in Nova Scotia, Canada. With over 40 years of photographic experience, Paul’s work has been published by National Geographic, used by The Royal Canadian Mint in the form of a coin, by Canada Post in the form of a stamp, and featured in a number of international publications. You can find more of his work on his website. This article was also published here.
